
This setup works, but a bit complicated. I love Claude Code, but am using Opencode right now for a simpler path and less token usage. It is not exactly the same, but close. You might want to test it. ☺️
Because we can’t send company information to just any LLM (in this case Anthropic), I wanted to use Claude Code with our company approved GitHub Copilot. We are already running agents in VSCode and IDEA, so sending requests to their LLMs is not new.
After a bit of research, I found that Claude Code also has documentation for doing something similar to this, so it is not a very far-fetched way to use CC. The plan became:
- Set up Claude Code to communicate through a “translation layer” (proxy): https://docs.anthropic.com/en/docs/claude-code/llm-gateway
- Launch LiteLLM locally (can’t send traffic to them): https://docs.litellm.ai/#quick-start-proxy—cli
- Configure LiteLLM to use GitHub Copilot: https://docs.litellm.ai/docs/providers/github_copilot
NOTE: It seems this setup doesn’t let me do proper tool calling. Claude Code tries to do a web search sometimes, and that just fails with a server error. So probably not supported on the Copilot side.
WARNING: It seems to use a lot more credits (Github Copilot quota) than the Copilot Agents in VSCode and IDEA. So be prepared to be out of credits by mid month like I was.
Setup steps
If you don’t want to follow these manually Kjetil Jørgensen-Dahl has codified them in this Github repository: https://github.com/kjetiljd/claude-code-over-github-copilot
Here are the manual steps I followed:
1. Create tokens and config
We randomize with uuidgen:
# Write to a file that we can use
# again after reboot
echo LITELLM_MASTER_KEY="litellm-$(uuidgen)" > litellm-keys.env
echo LITELLM_SALT_KEY="litellm-$(uuidgen)" >> litellm-keys.env
# Then we source these to bring them
# into the environment. This has to
# be the shell you run the litellm
# command in.
source litellm-keys.env2. Create LiteLLM configuration
Create a config for LiteLLM and save to copilot-config.yaml:
model_list:
  - model_name: gpt-4
    litellm_params:
      model: github_copilot/gpt-4
      extra_headers: {"Editor-Version": "vscode/1.85.1", "Copilot-Integration-Id": "vscode-chat"}
  - model_name: claude-opus-4
    litellm_params:
      model: github_copilot/claude-opus-4
      extra_headers: {"Editor-Version": "vscode/1.85.1", "Copilot-Integration-Id": "vscode-chat"}
  - model_name: claude-sonnet-4
    litellm_params:
      model: github_copilot/claude-sonnet-4
extra_headers: {"Editor-Version": "vscode/1.85.1", "Copilot-Integration-Id": "vscode-chat"}3. Launch LiteLLM
$ pip install 'litellm[proxy]'
# You only need the litellm
# command the next time to launch
$ litellm --config copilot-config.yamlYou might get some issues with this on a managed system like Ubuntu. If you need a local Python to do pip installs I recommend mise-en-place.
The first time you should see a message to authenticate GitHub. Go to the URL and enter the code to authenticate. Like this:
Please visit https://github.com/login/device
and enter code XXXX-XXXX to authenticate.4. Test the setup
Do a test request in another terminal:
$ curl --location 'http://0.0.0.0:4000/chat/completions' \
--header 'Content-Type: application/json' \
--header 'Editor-Version: CommandLine/1.0' \
--data '{
  "model": "gpt-4",
  "messages": [
    {
      "role": "user",
      "content": "what llm are you"
    }
  ]
}'5. Configure Claude Code
When the curl is working and returning a response, we can move on.
Configure Claude Code with the necessary variables. You can do this on a project basis, but I have added it to my user config. Look at the docs for possible locations. Open an editor to ~/.claude/settings.json and add these variables:
"env": {
  "ANTHROPIC_AUTH_TOKEN": "litellm-UUID-MASTER-KEY-from-env-file",
  "ANTHROPIC_BASE_URL": "http://localhost:4000",
  "ANTHROPIC_MODEL": "claude-sonnet-4",
  "ANTHROPIC_SMALL_FAST_MODEL": "gpt-4"
}Tip: If you add these to your user config, you can disable it on a project basis by setting them to a blank string in the project config.
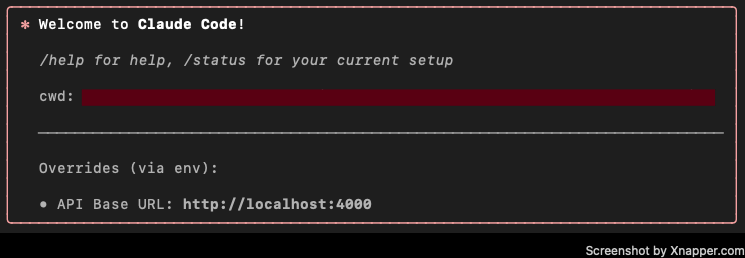
6. Test Claude Code
Open Claude Code. You should see a box warning you that you are using http://localhost:4000. Try a query. 🙂
Good luck! 😊
10 replies on “Using Claude Code with GitHub Copilot: A Guide”
Not sure it works anymore. I tried and got this when I make requests from claude. I also tried the curl by passing the bearer token with the master key and I get this:
{“error”:{“message”:”No connected db.”,”type”:”no_db_connection”,”param”:null,”code”:”400″}}
Just checked and it is still working. The error message you are seeing is probably from LiteLLM. It does have a database support, but that shouldn’t be needed (or triggered). What does the Litellm logs say?
How is copilot usage tracked? For copilot, i get 200 premium requests per month. does each message to cc use 1 request or multiple depending on the tools called?
Also, unrelated but I am having trouble with vscode copilot managing terminals. It starts a process in one terminal runs a sleep command in the same terminal so the process get’s cancelled. It’s so annoying >.<
Not sure how the usage is tracked. I do know it burns my Github Copilot quota MUCH faster than the Copilot agent. Like empty in a week, if I am lucky. 🙂
Is this really worth it over the existing claude sonnet 4.5 agent within copilot itself? I’m wondering wherter I should get my company to buy cluade when we already have copilot
I think so. My experience is that there is a big difference between the agents (not the models), but your mileage may vary. 🙂
It would be good that we can use claude code with Copilot’s 0x models such as Grok code fast 1
You can use any of the models in Github Copilot, just change the litellm config. In my experience though it doesn’t work that well.
If I try to use the github_copilot/claude-sonnet-4.5 model instead, I’m getting this error:
litellm.exceptions.UnsupportedParamsError: litellm.UnsupportedParamsError: github_copilot does not support parameters: [‘thinking’], for model=claude-sonnet-4.5. To drop these, set `litellm.drop_params=True` or for proxy:
`litellm_settings:
drop_params: true`
.
Any ideas that do not involve dropping the params?
No sorry. These are one of those things that gets weird with using a “work around”. I have started using Opencode with Github Copilot, and that seems a better fit. Even if it is not Claude Code. You might want to try that. 🙂